這是本文件的舊版!
安裝 OpenCode (Ubuntu 24.04)
安裝程序
curl -fsSL https://opencode.ai/install | bash- 之後如果要更新也是執行
curl -fsSL https://opencode.ai/install | bash
使用方式
- 進入專案目錄執行
opencode
安裝與選用 plugin / MCP / Skills
安裝 Oh My OpenCode
- Ref - https://github.com/code-yeongyu/oh-my-opencode
sudo snap remove bun-js
sudo apt install unzip
curl -fsSL https://bun.sh/install | bash
source ~/.bashrc
cp ~/.config/opencode/opencode.json ~/.config/opencode/opencode.json.bak
bunx oh-my-opencode install
- Oh My OpenCode 內建配置熱門的 MCP Exp. context7(動態文檔), grep_app, websearch , 因此就不需要安裝這三個 MCP
- Serena MCP : OpenCode 原生就支援 LSP 因此就不需要安裝 Serena MCP
- ulw : UltraWork Mode → 讓所有 Agent 可以儘可能最大極限合作執行 Exp.
ulw 請優化後台 UI/UX 讓操作更簡易 - ralph-loop : 自主持續迭代 → 讓 AI 持續不停優化 Exp. 搭配 ulw 使用
ulw /ralph-loop "優化首頁載入時間 <1.5s(Lighthouse 分數 >95)" --max-iterations 25 --completion-promise "Lighthouse 性能分數 >95" - mcp_tool 執行 playwrite 出現 JSON 異常問題 - 參考解法 - https://github.com/code-yeongyu/oh-my-opencode/issues/729
安裝 Claude 官方提供的 Skills
安裝 ui-ux-pro-max-skill
# Install CLI globally
sudo npm install -g uipro-cli

# Go to your project
cd /path/to/your/project
# Install for your AI assistant
uipro init --ai opencode    # OpenCode
- 重新啟動 opencode 輸入 “Build a landing page for a SaaS product”
安裝 openspec
- Step 1.
sudo npm install -g @fission-ai/openspec@latest
jonathan@claude-code-194:~$ openspec --version
0.21.0
- Step 2.
cd my-project
openspec init
- 複製畫面看到的這段
1. Populate your project context:
   "Please read openspec/project.md and help me fill it out
    with details about my project, tech stack, and conventions"

2. Create your first change proposal:
   "I want to add [YOUR FEATURE HERE]. Please create an
    OpenSpec change proposal for this feature"

3. Learn the OpenSpec workflow:
   "Please explain the OpenSpec workflow from openspec/AGENTS.md
    and how I should work with you on this project"
等等貼到 opencode , 分析目前專案狀態產生 openspec/project.md (PRD 檔), 當然也可以使用原本的 PRD 檔案複製成 project.md
- 進入 opencode 執行 /openspec 命令
- Draft the Proposal Exp.
/openspec:proposal Add profile search filters - Verify & Review
$ openspec list                             # Confirm the change folder exists
$ openspec validate add-profile-filters     # Validate spec formatting
$ openspec show add-profile-filters         # Review proposal, tasks, and spec delta
- Refine the Specs
請修正 xxx 功能, 將 abc 改成 zyx - Implement the Change
The specs look good. Let's implement this change. - Archive the Completed Change
$ openspec archive add-profile-filters --yes # Archive the completed change without prompts
- 查看規格清單
openspec list - 更版方式
sudo npm install -g @fission-ai/openspec@latest
cd myproject
openspec update
安裝 lancedb-opencode-pro
- 讓 OpenCode 可以增加長記憶功能, 累積專案實際處理過程經驗資料, 解決 AI 重複使用錯誤方式來處理專案內相似議題
- 需要有 embedding 模型 Exp. ollama → nomic-embed-text , OpenAI → text-embedding-3-small
- 修改 ~/.config/opencode/opencode.json Exp.
{ "$schema": "https://opencode.ai/config.json", "plugin": [ "oh-my-opencode", "lancedb-opencode-pro" ] } - 加上設定檔 ~/.config/opencode/lancedb-opencode-pro.json Exp. 本機有安裝啟動 ollama 服務與下載 nomic-embed-text 模型
{ "provider": "lancedb-opencode-pro", "dbPath": "~/.opencode/memory/lancedb", "embedding": { "provider": "ollama", "model": "nomic-embed-text", "baseUrl": "http://127.0.0.1:11434" }, "retrieval": { "mode": "hybrid", "vectorWeight": 0.7, "bm25Weight": 0.3, "minScore": 0.2, "rrfK": 60, "recencyBoost": true, "recencyHalfLifeHours": 72, "importanceWeight": 0.4 }, "includeGlobalScope": true, "globalDetectionThreshold": 2, "globalDiscountFactor": 0.7, "unusedDaysThreshold": 30, "minCaptureChars": 80, "maxEntriesPerScope": 3000 } - 重新啟動 opencode
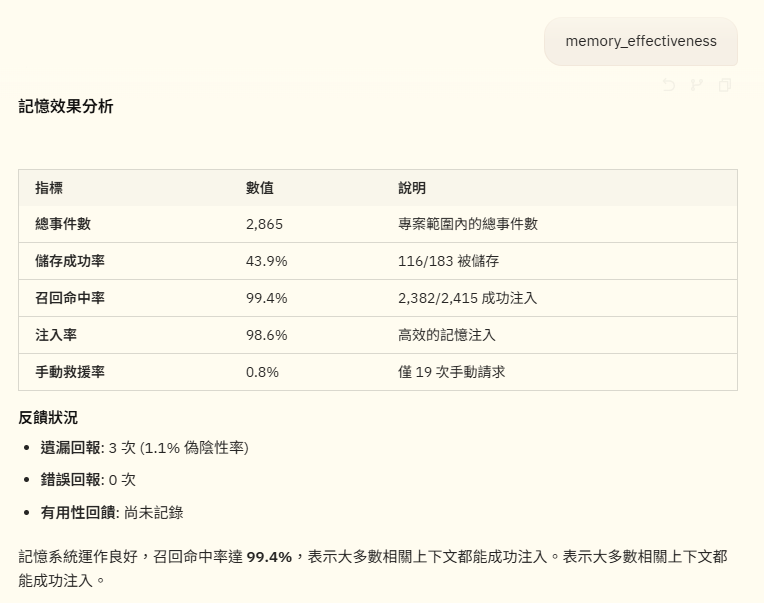
- 使用 memory_effectiveness 查看長記憶的狀態

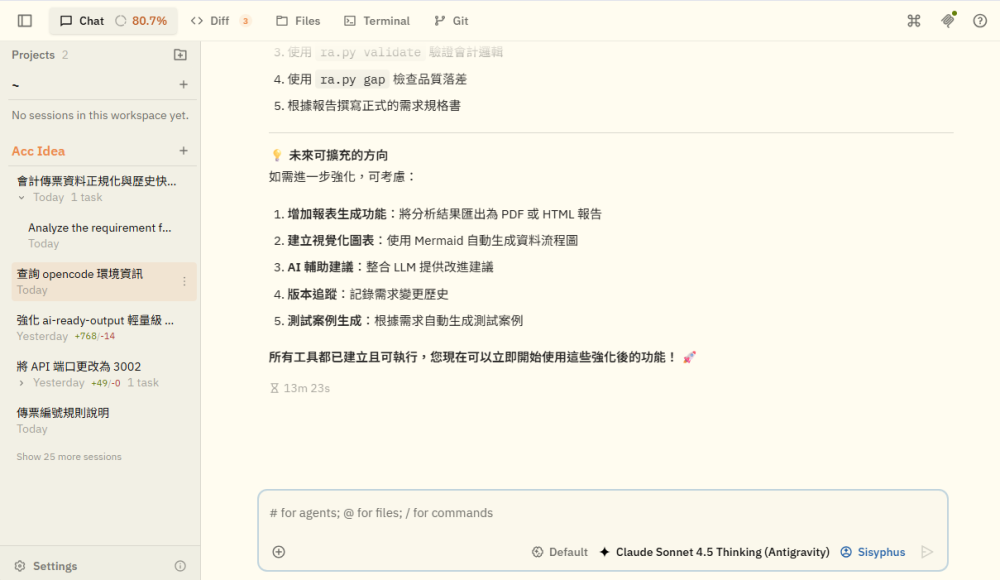
使用 openchamber Web 操作介面
# Quick install (auto-detects your package manager)
curl -fsSL https://raw.githubusercontent.com/btriapitsyn/openchamber/main/scripts/install.sh | bash

# Quick start daemon
openchamber --port 6001 --daemon

# 其他參數
openchamber                          # Start on port 3000
openchamber --port 8080              # Custom port
openchamber --daemon                 # Background mode
openchamber --ui-password secret     # Password-protect UI
openchamber --try-cf-tunnel          # Create a Cloudflare Quick Tunnel for remote access
openchamber --try-cf-tunnel --tunnel-qr              # Show QR code for easy mobile access
openchamber --try-cf-tunnel --tunnel-password-url   # Include password in URL for auto-login
OPENCODE_PORT=4096 OPENCODE_SKIP_START=true openchamber  # Connect to external OpenCode server
openchamber stop                     # Stop server
openchamber update                   # Update to latest version

有訂閱 Google AI Pro 用戶進行認證登入
3 月份開始 Google 大量封鎖這類用法的帳戶, 使用者請自行評估與斟酌是否使用