設定 Cloudflare WARP + Tunnel 取代 VPN
- 預計配置架構
flowchart LR
client1[WARP Client 1] --> warp[Cloudflare WARP Service]
client2[WARP Client 2] --> warp
client3[WARP Client 3] --> warp
client4[WARP Client 4] --> warp
warp --> tunnelA[Cloudflare Tunnel A
192.168.11.0/24] warp --> tunnelB[Cloudflare Tunnel B
10.20.0.0/22] tunnelA --> server1[Local Server 1] tunnelA --> server3[Local Server 3] tunnelA --> server4[Local Server 4] tunnelB --> server2[Local Server 2] tunnelB --> server5[Local Server 5] %% Styling with more subtle colors and black font classDef client fill:#e6e6fa,stroke:#666,stroke-width:1px,color:#000 classDef cloudflare fill:#f0e6d2,stroke:#666,stroke-width:1px,color:#000 classDef server fill:#e0f0e0,stroke:#666,stroke-width:1px,color:#000 class client1,client2,client3,client4 client class warp,tunnelA,tunnelB cloudflare class server1,server2,server3,server4,server5 server
1. 確認 tunnel 的 Private Network

2. 設定存取權限
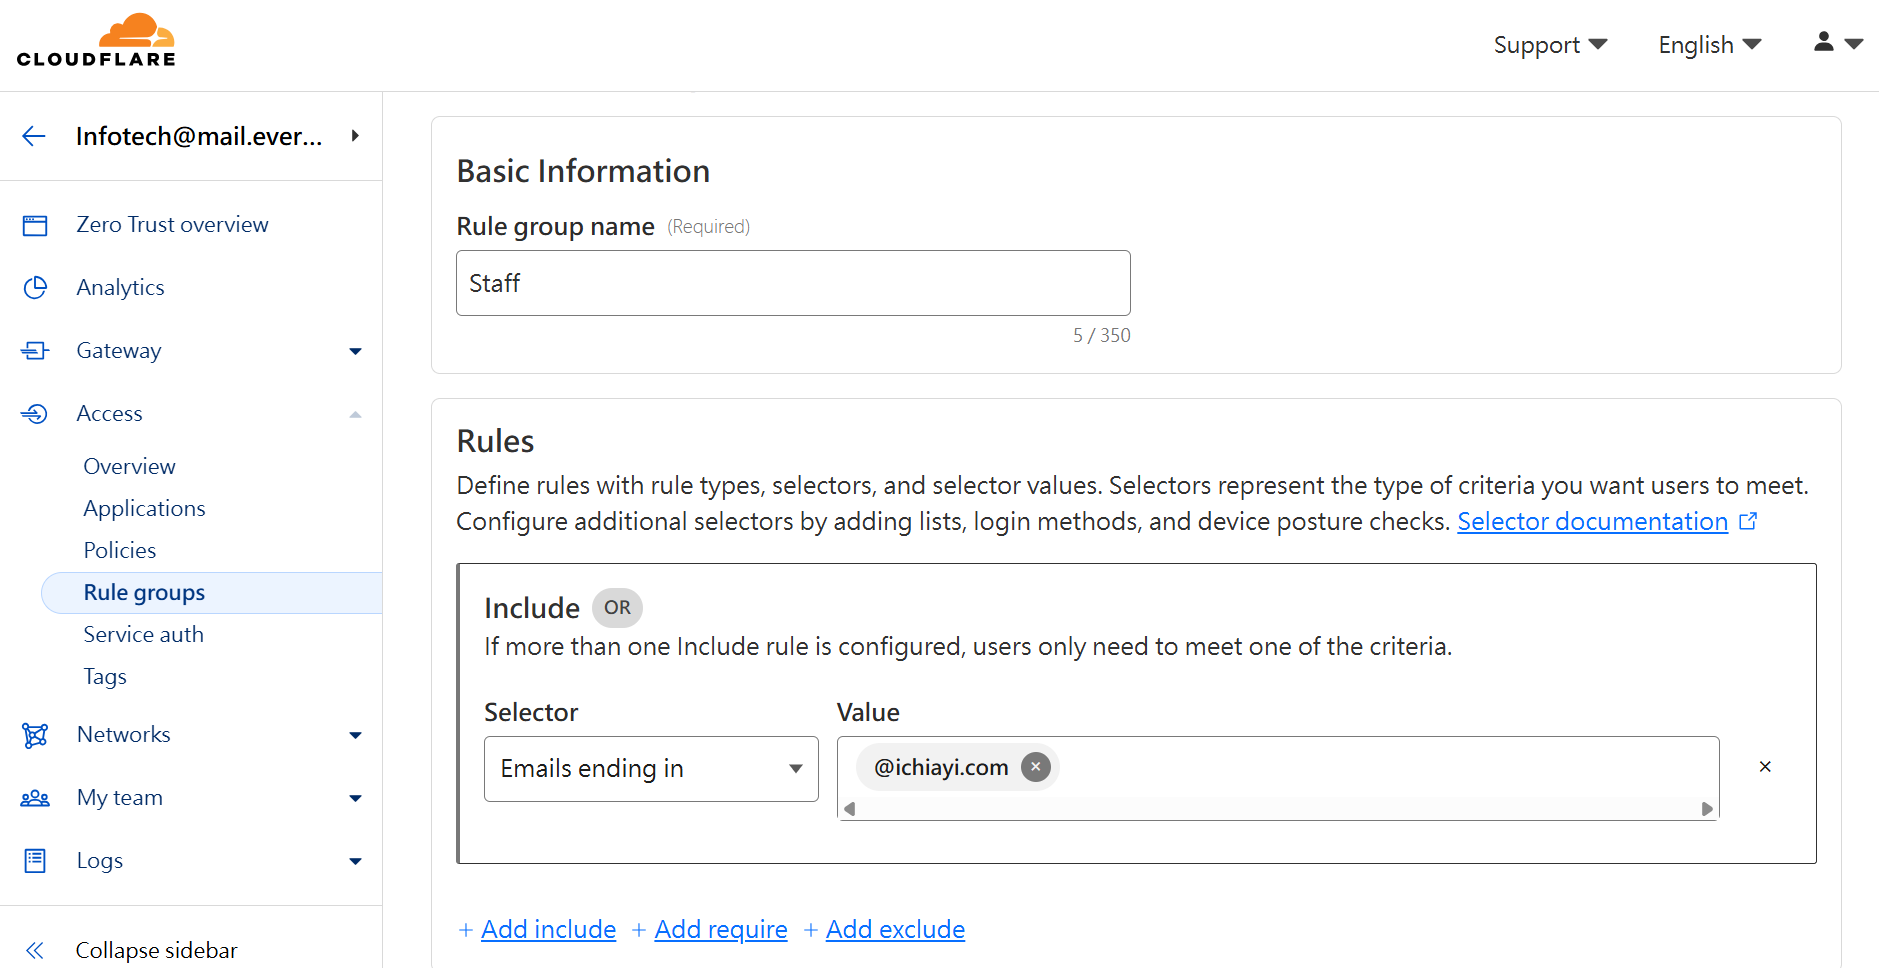
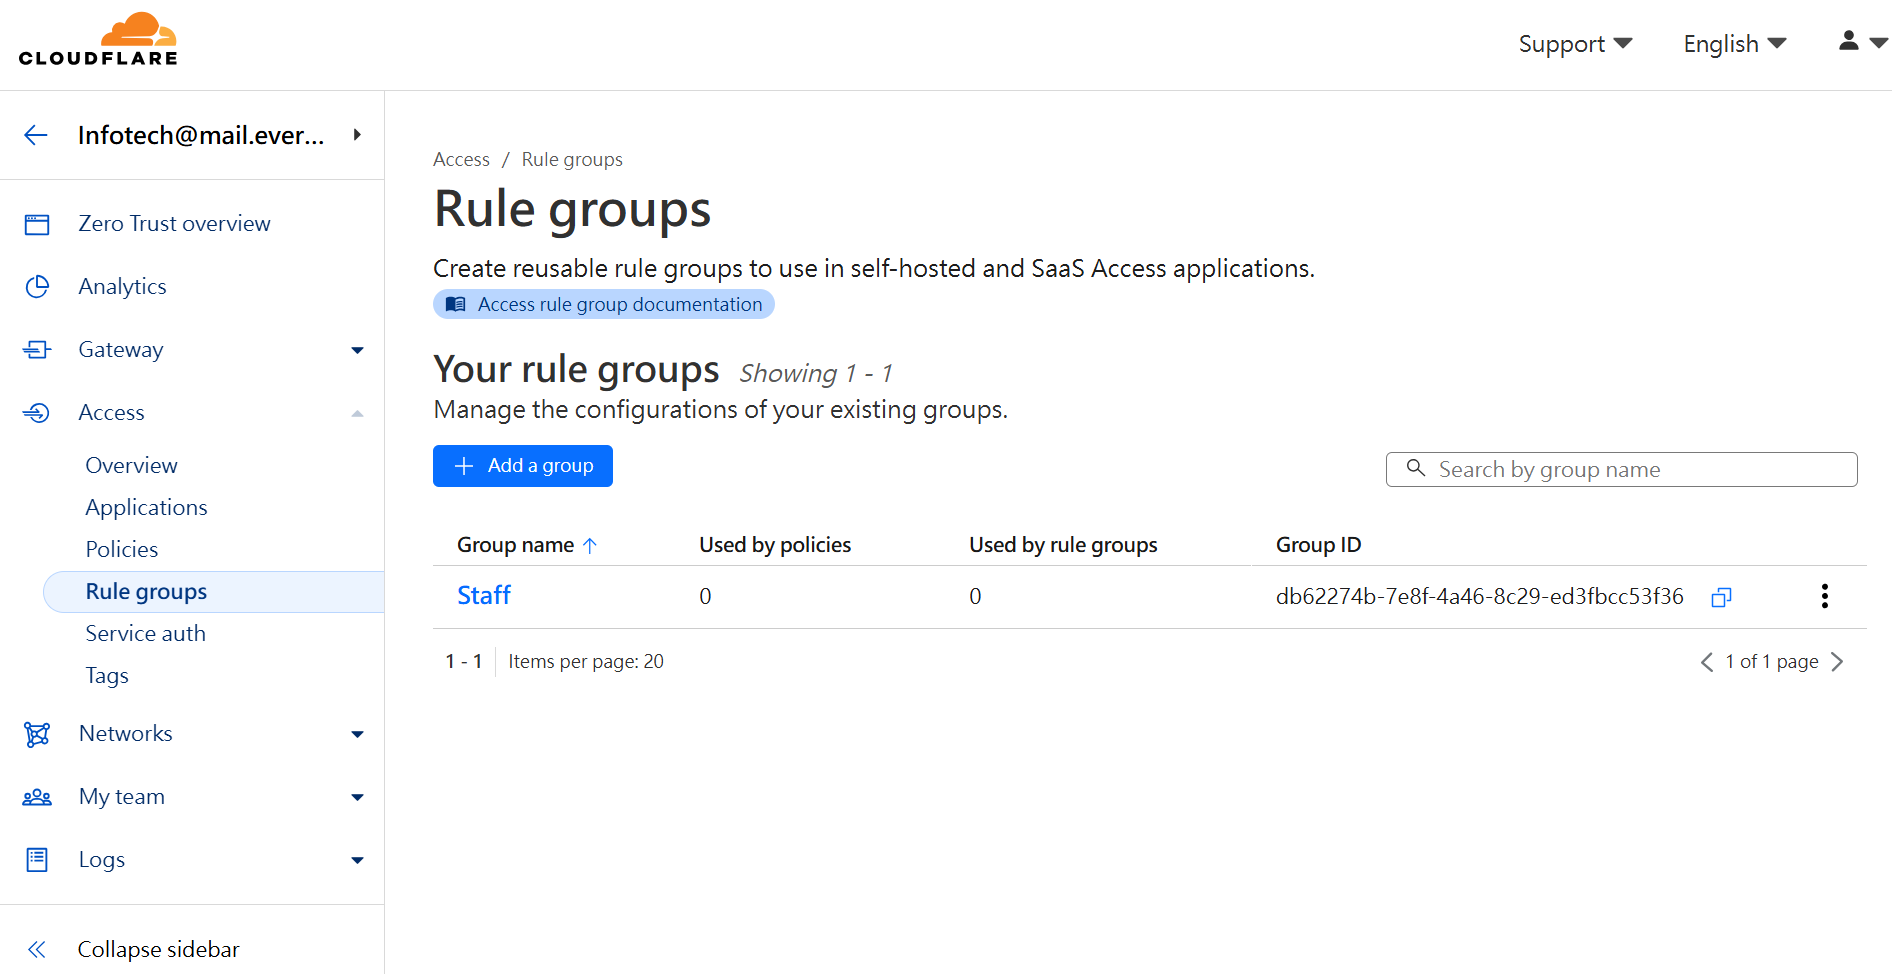
設定群組
- Access → Rule groups → Add a group Exp. Staff → Email 後面符合 @ichiayi.com


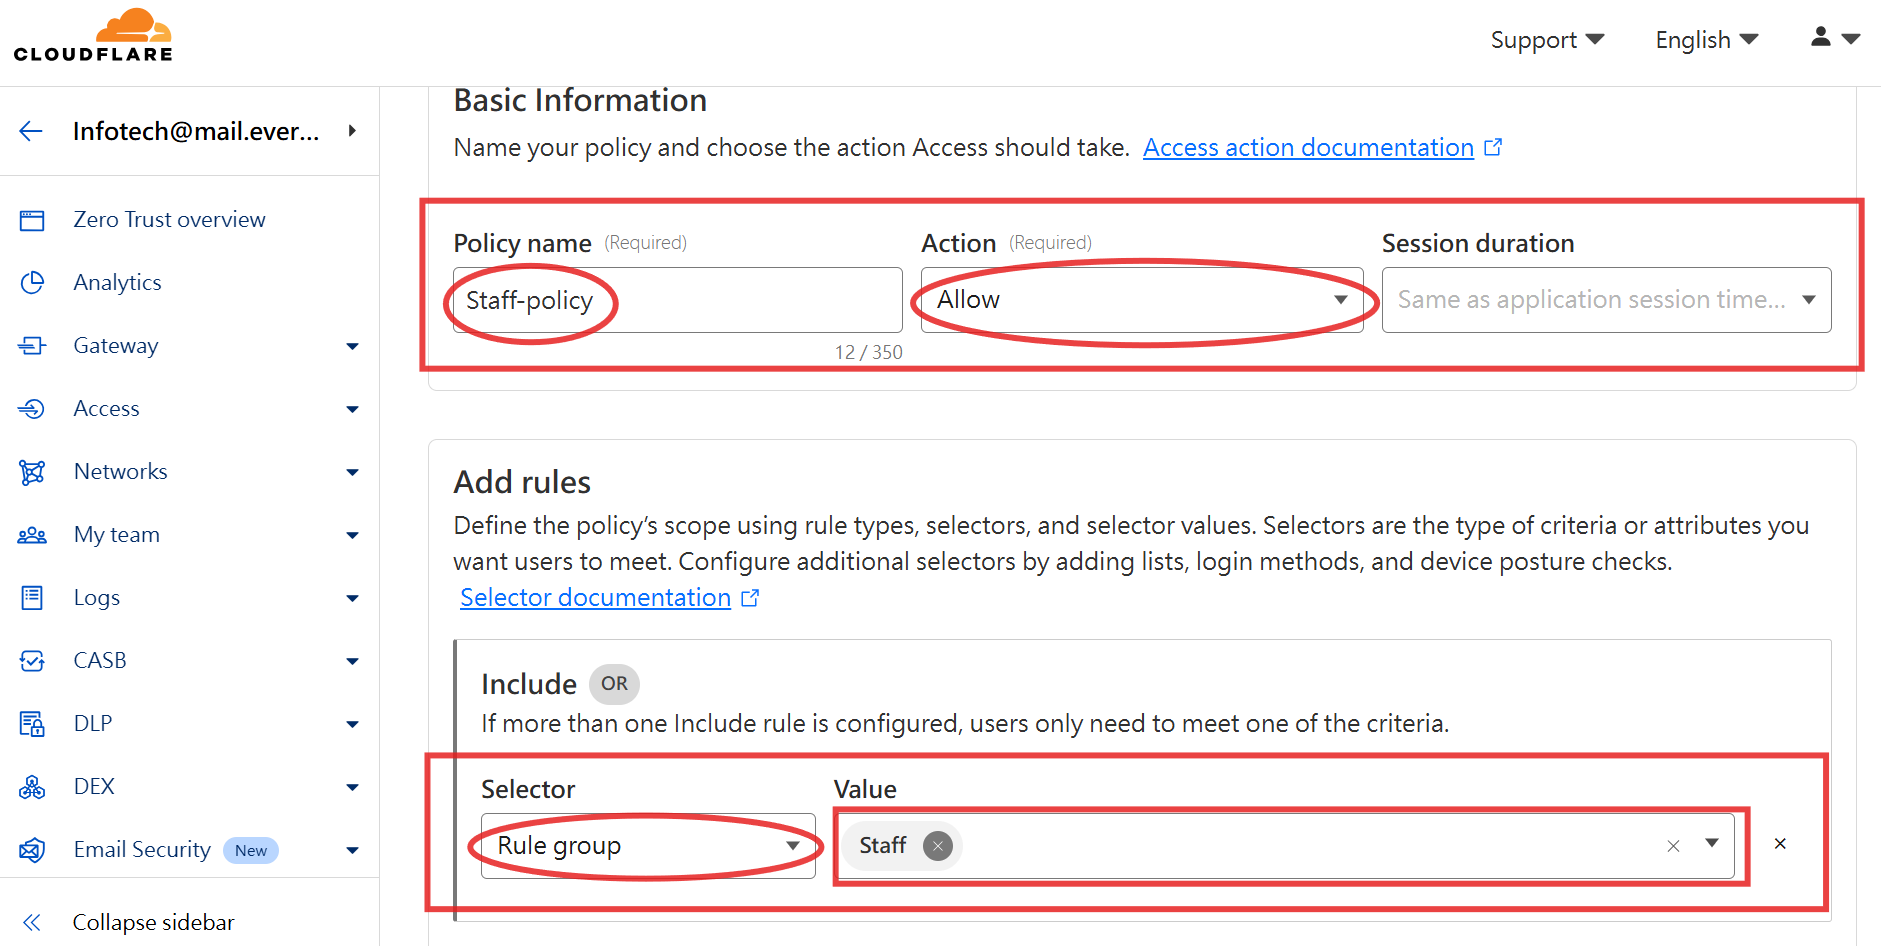
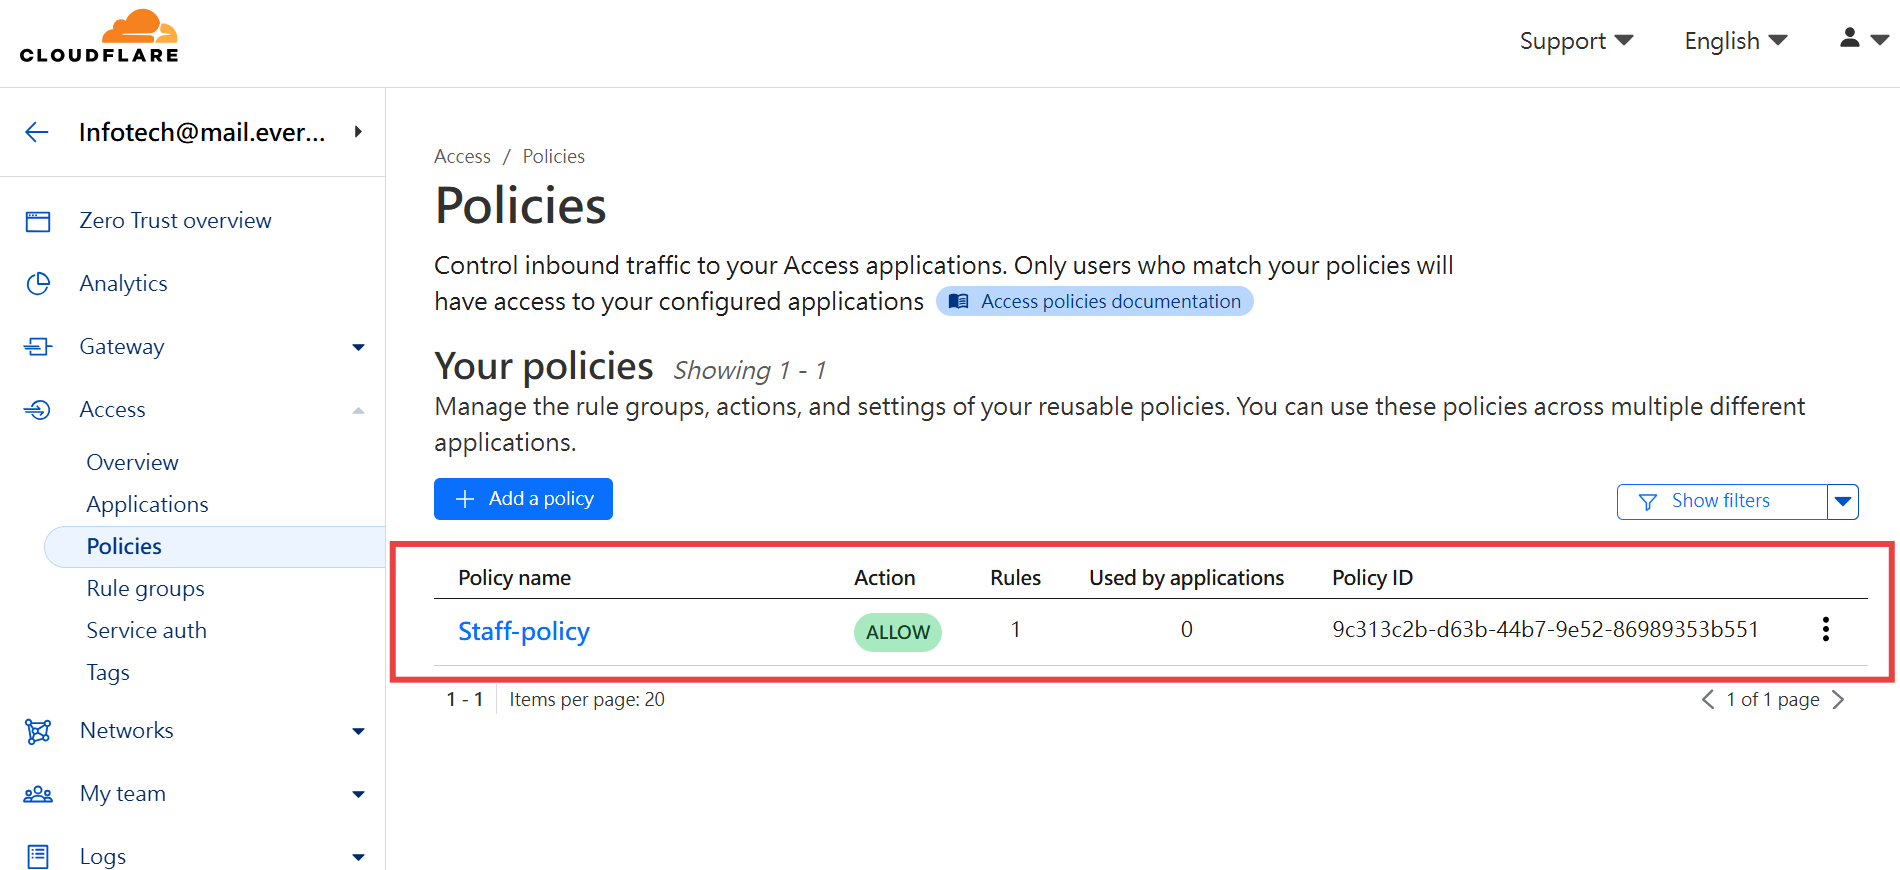
設定權限
- Access → Policies→ Add a policy
- 新增規則 Exp. Staff-policy → 只要是屬於 Staff Group 就允許


3. 設定 WARP Client
第一次要選擇 Cloudflare Zero Trust 方案
- Settings → WARP Client → Choose Plan Exp. Free 方案

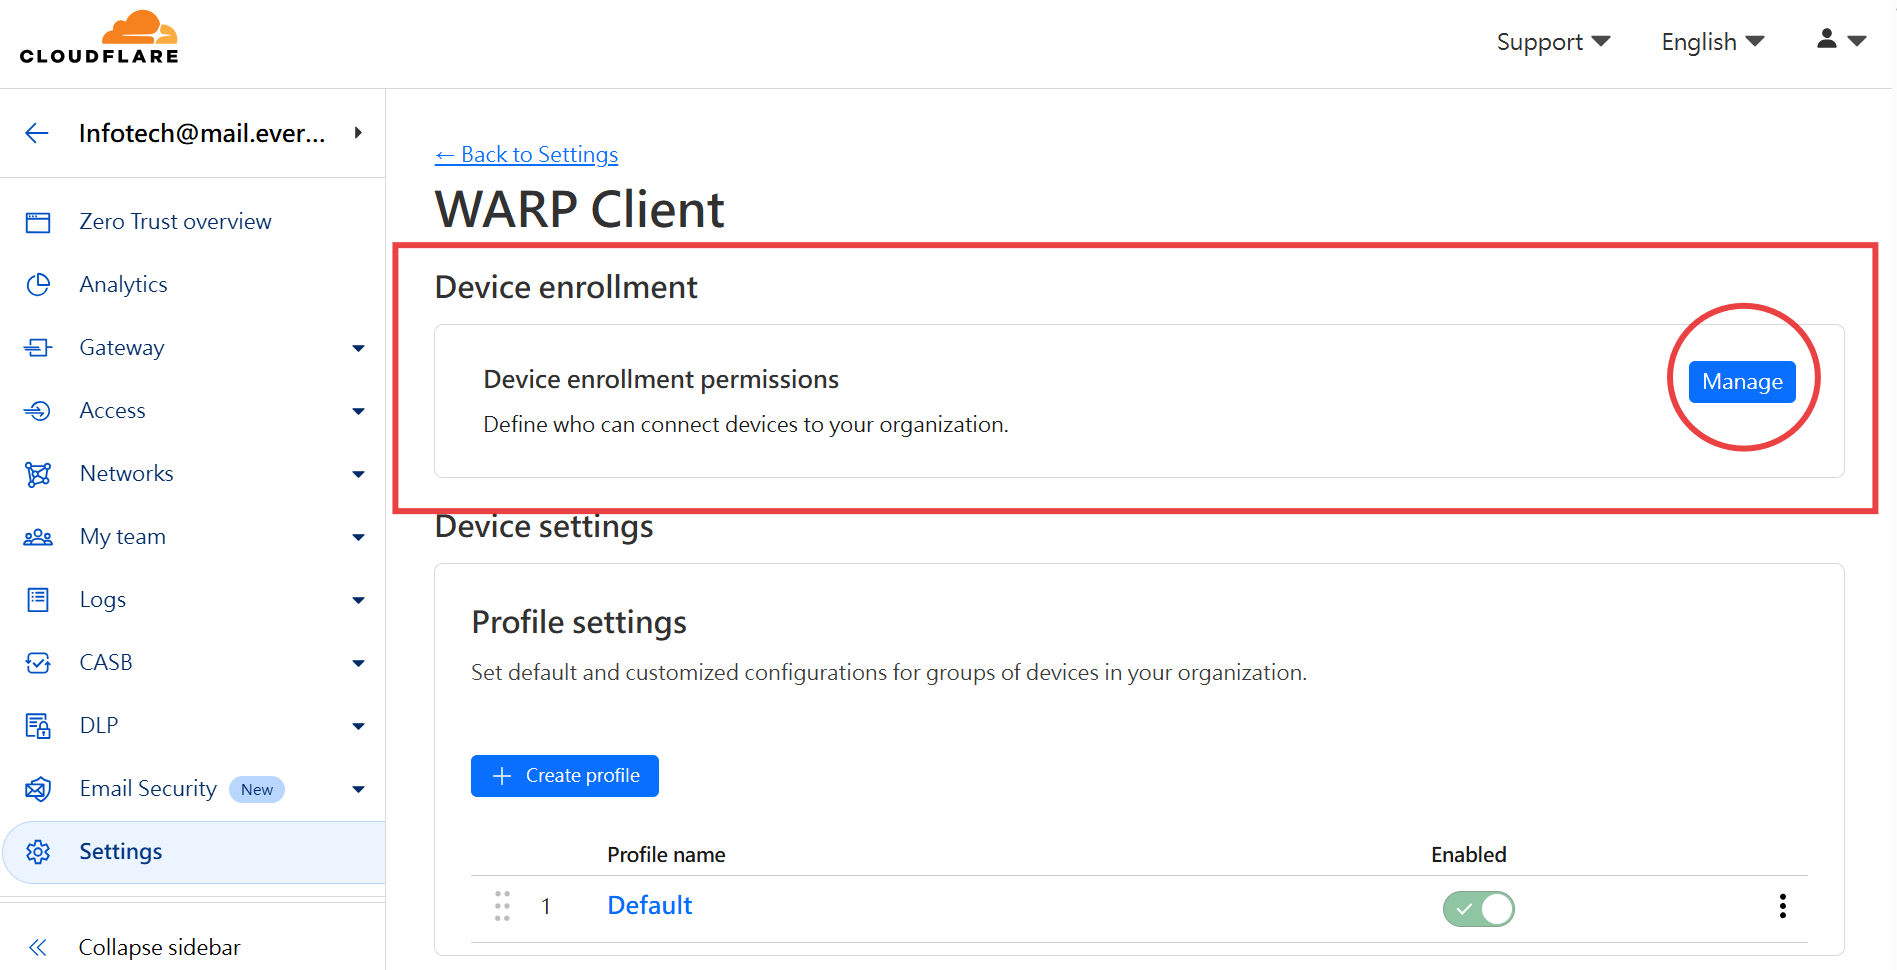
設定裝置註冊權限
- Settings → WARP Client → Device enrollment → Manage
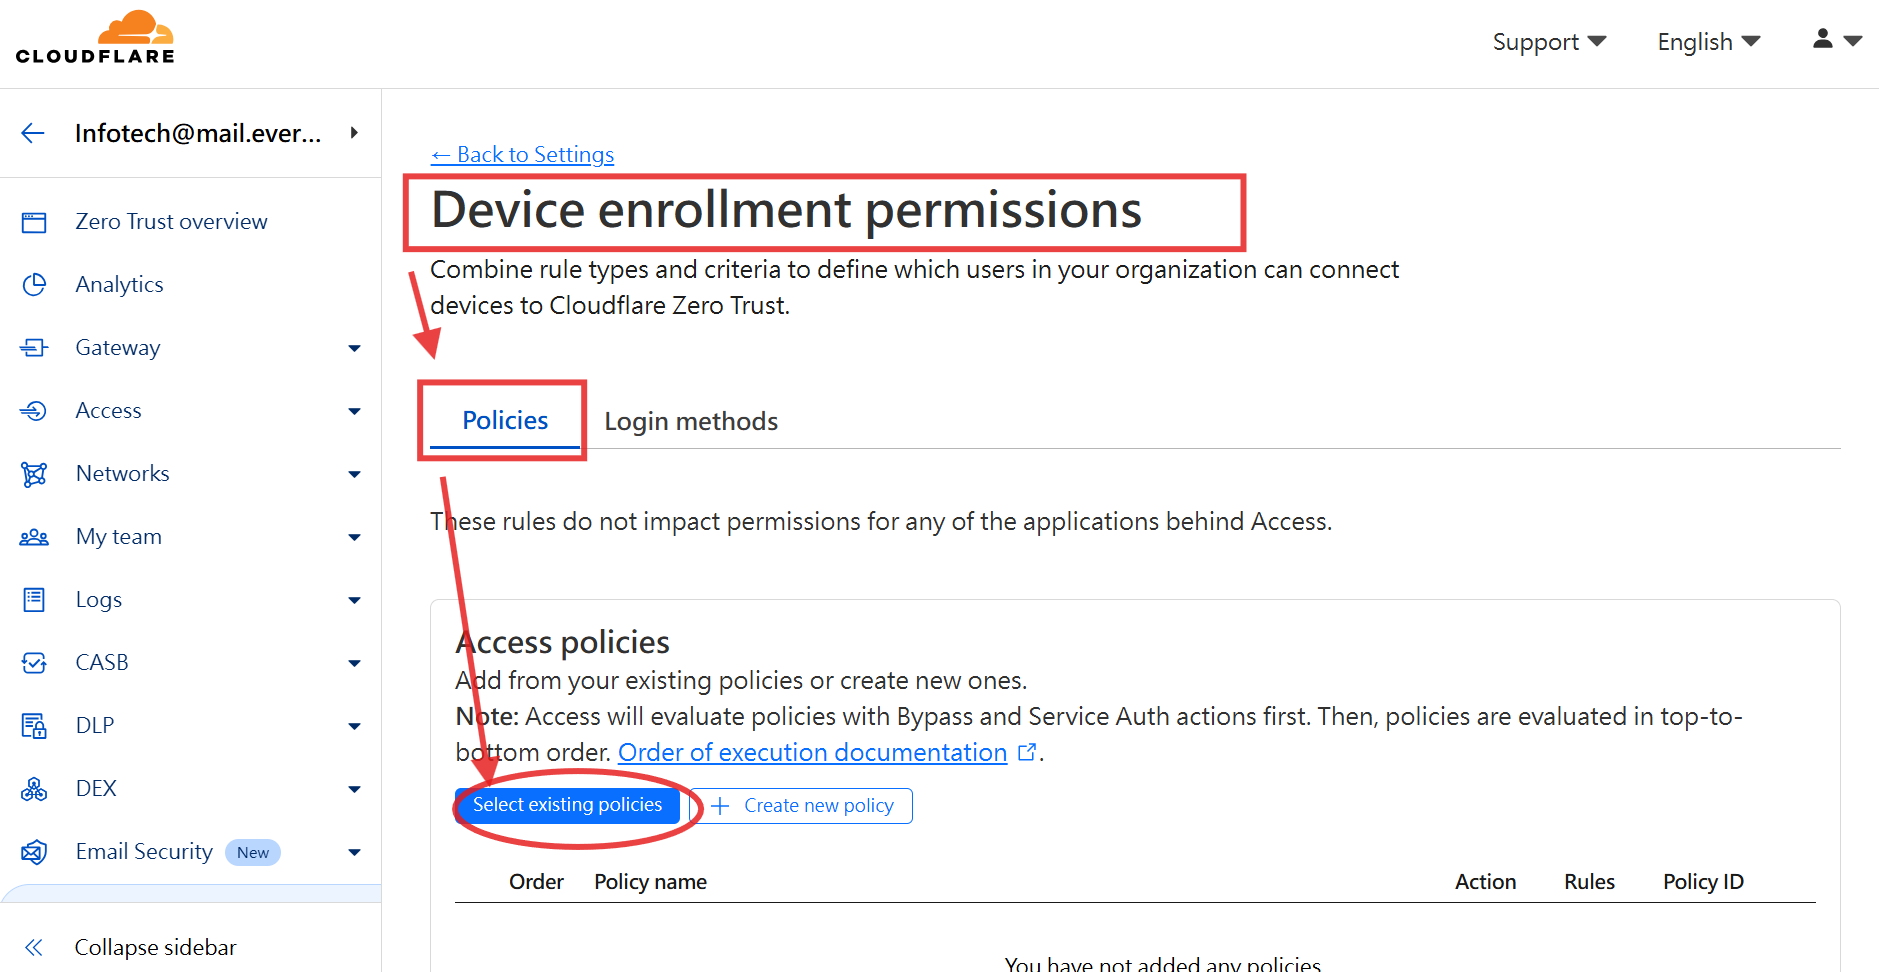
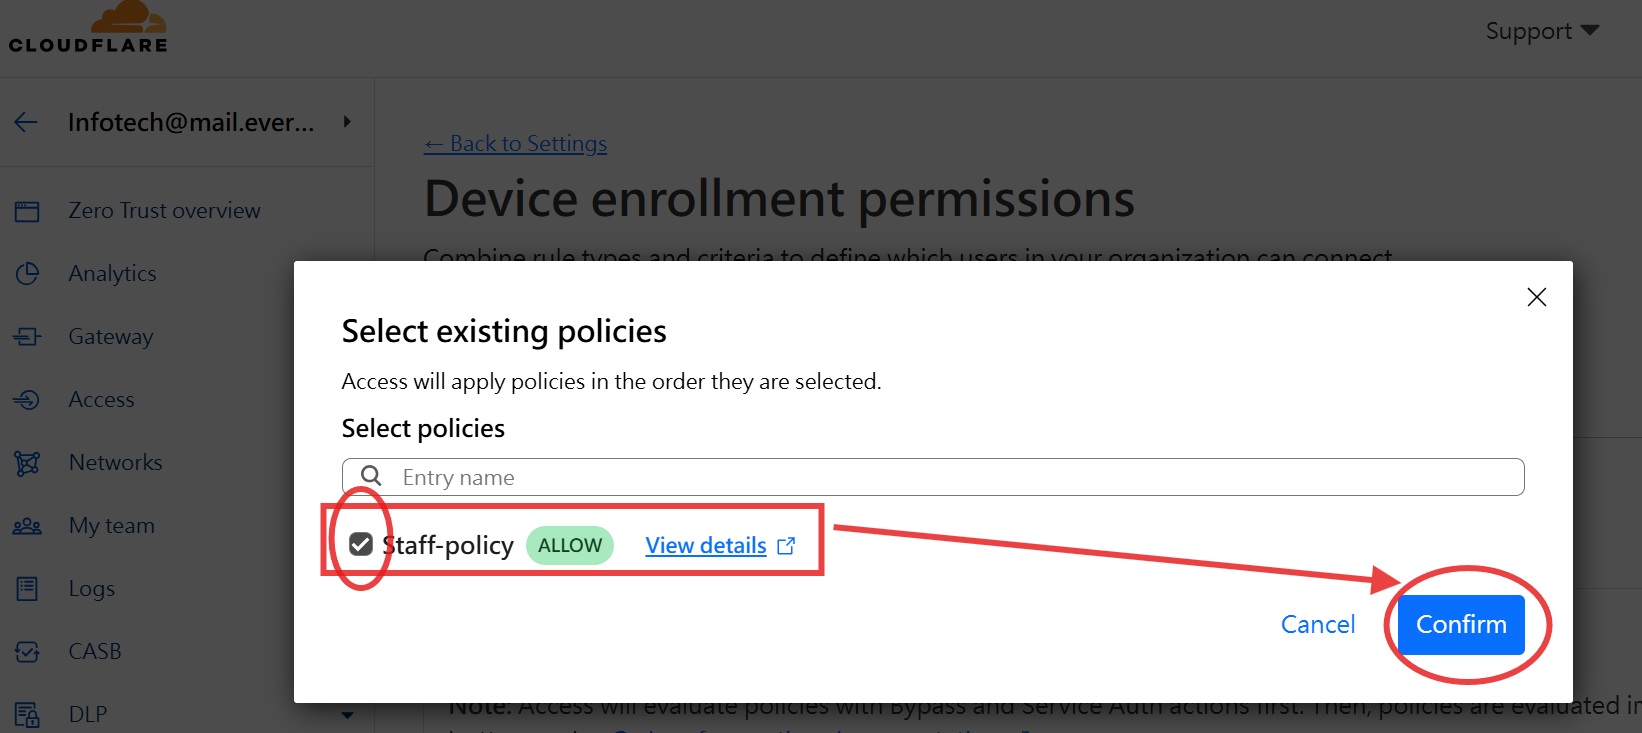
- Device enrollment permissions → Policies → Access policies → Select existing policies


設定 Split Tunnels
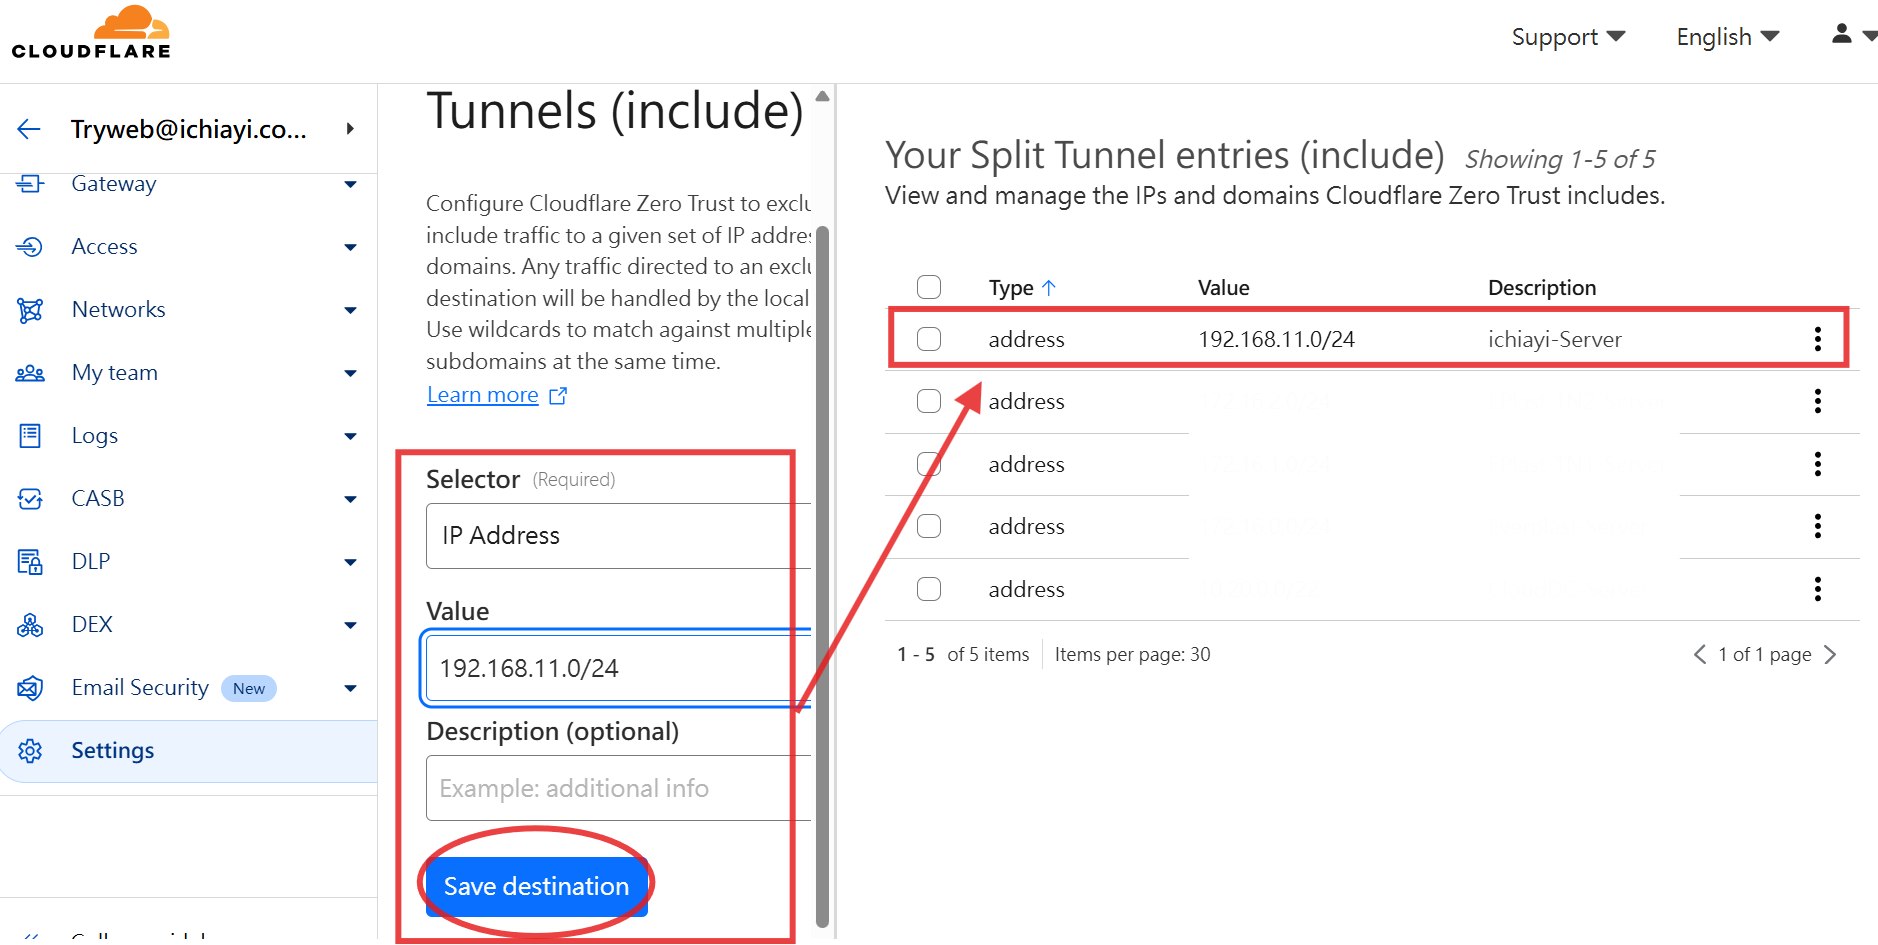
- 依據 Tunnel 網段來設定 WARP Client 網路的 Split Tunnels Exp. Include IPs and domains 將 192.168.11.0/24 與 10.20.0.0/22 加入
- Settings → WARP Client → Device settings / Profile settings / Profile name → Default → Congigure
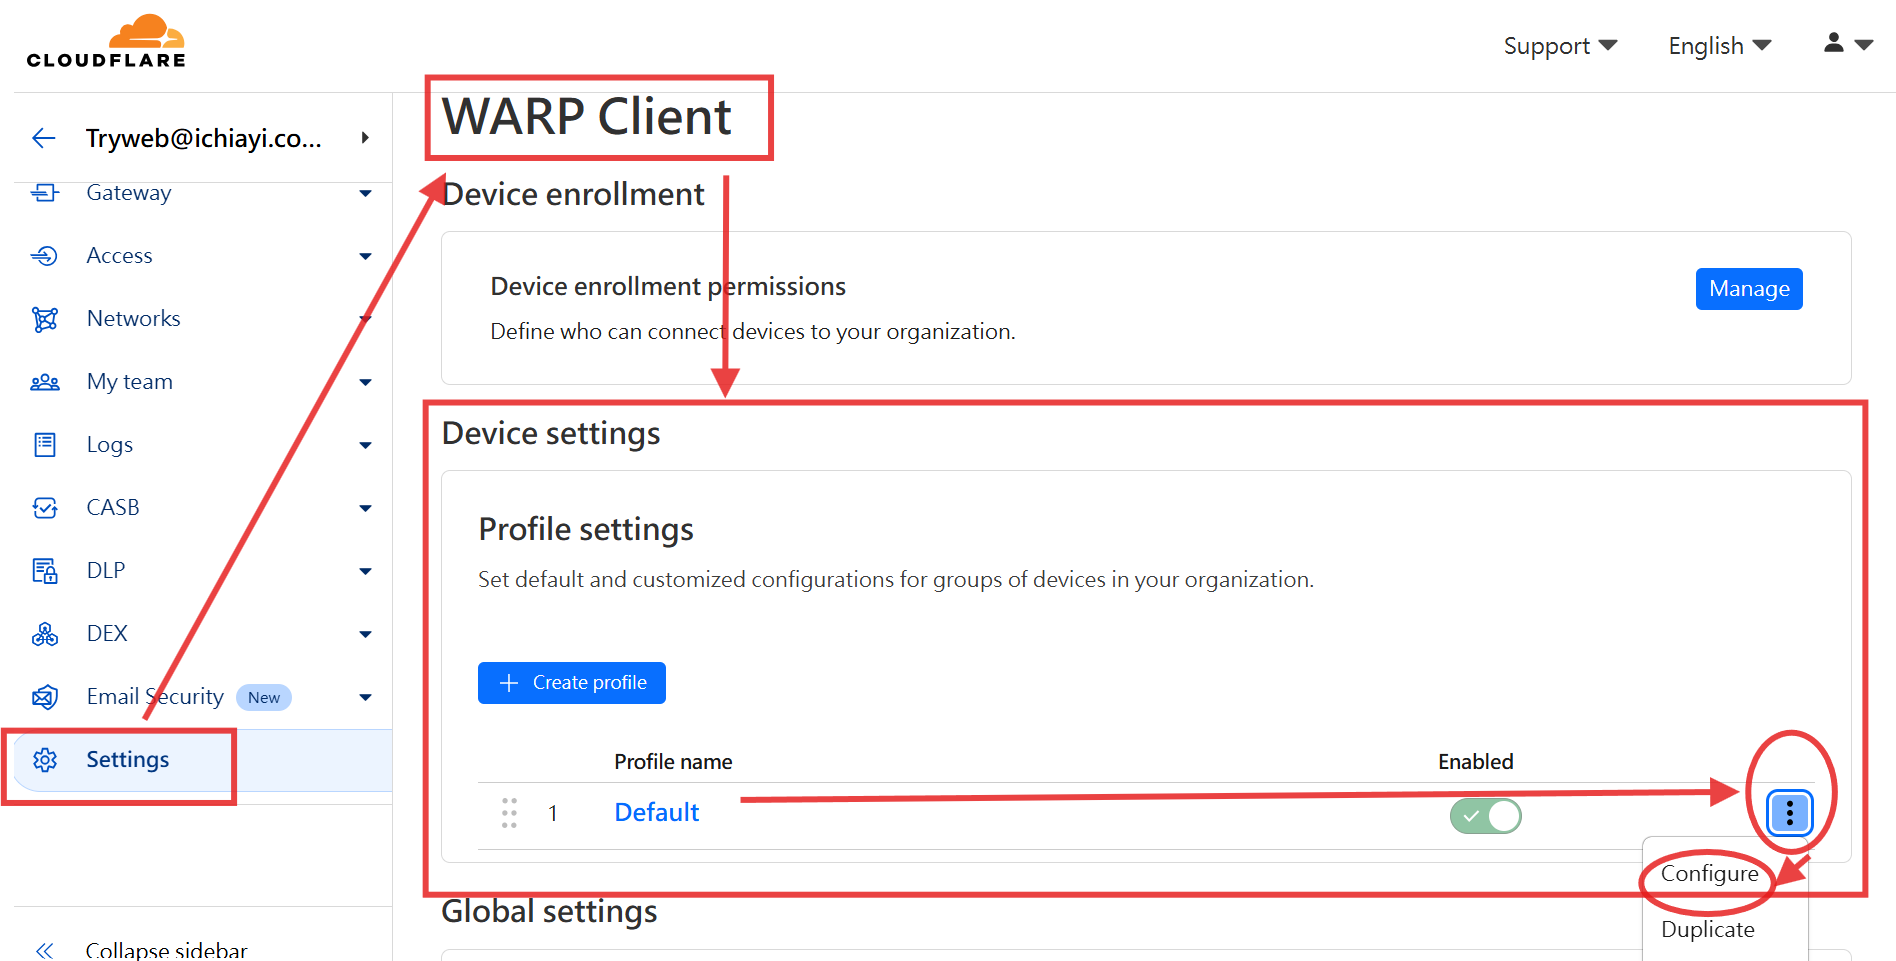
- 拉到中間出現 Split Tunnels 項目選 Include IPs and domains 後點 Manage
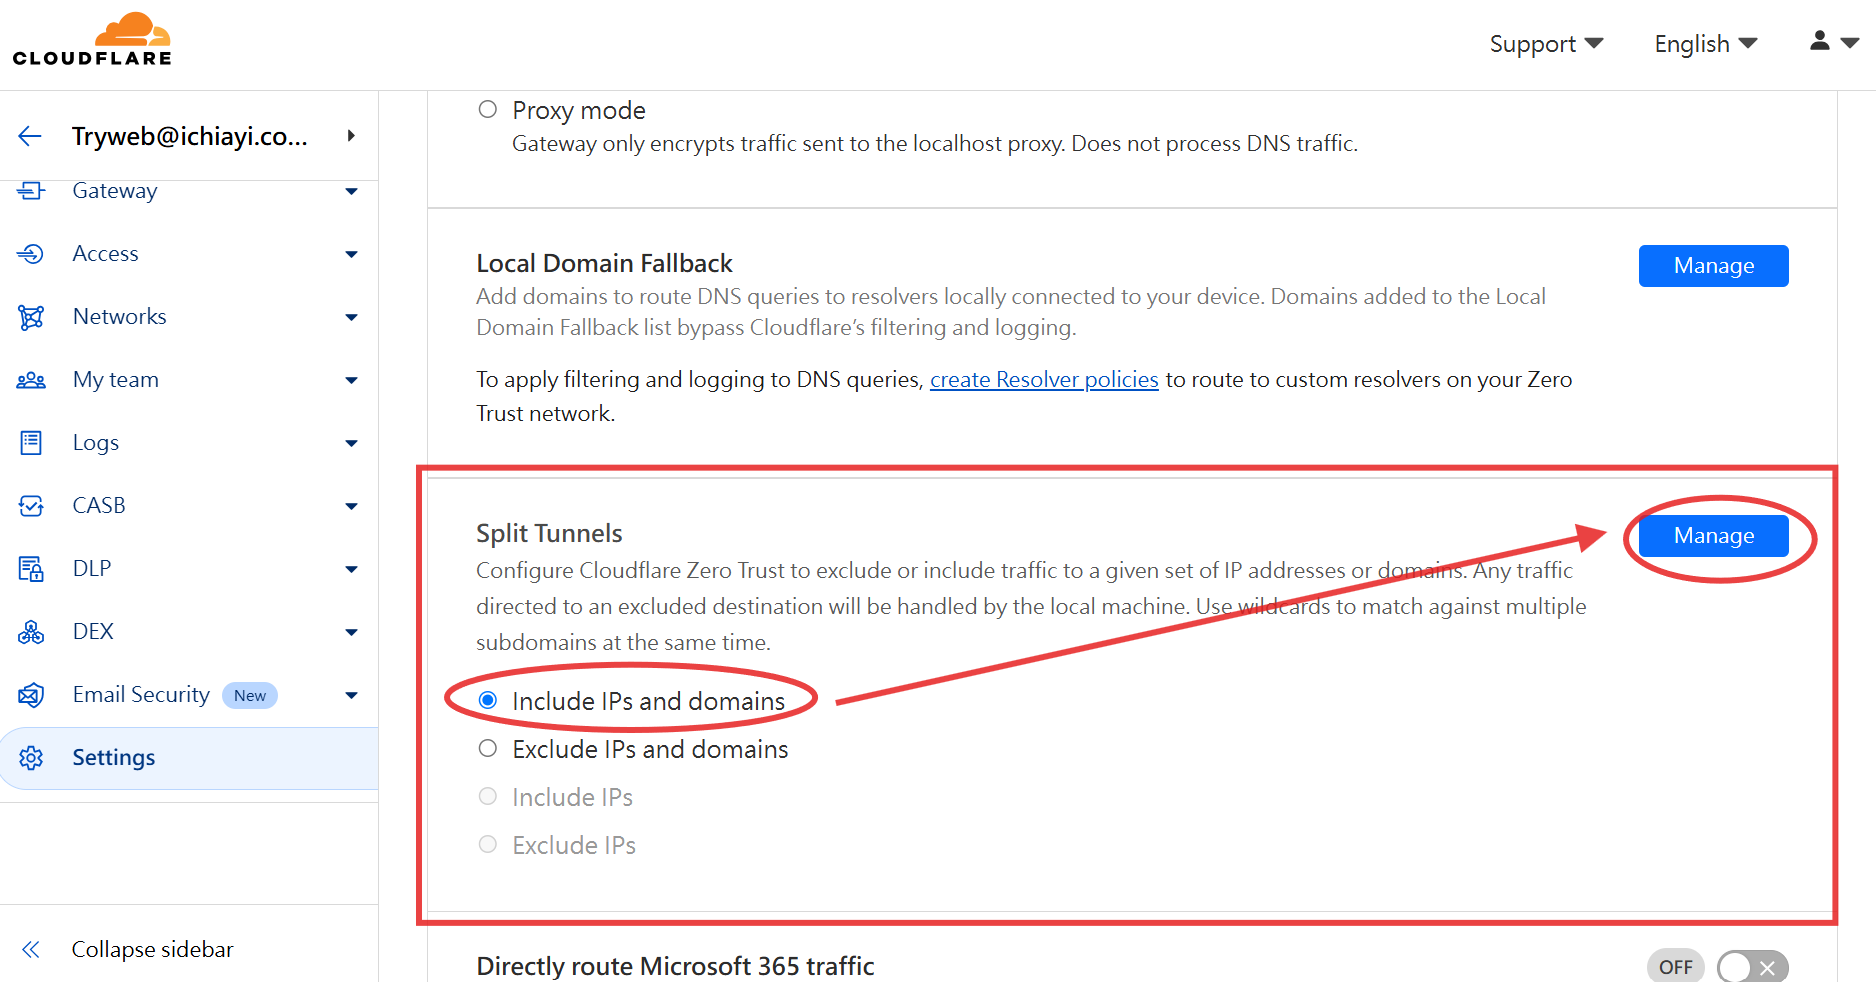
- 將 192.168.11.0/24 與 10.20.0.0/22 這兩個大網段, 設定要走 WARP


4. 用戶端安裝 WARP APP
- WARP 用戶端程式下載網址 - https://one.one.one.one/
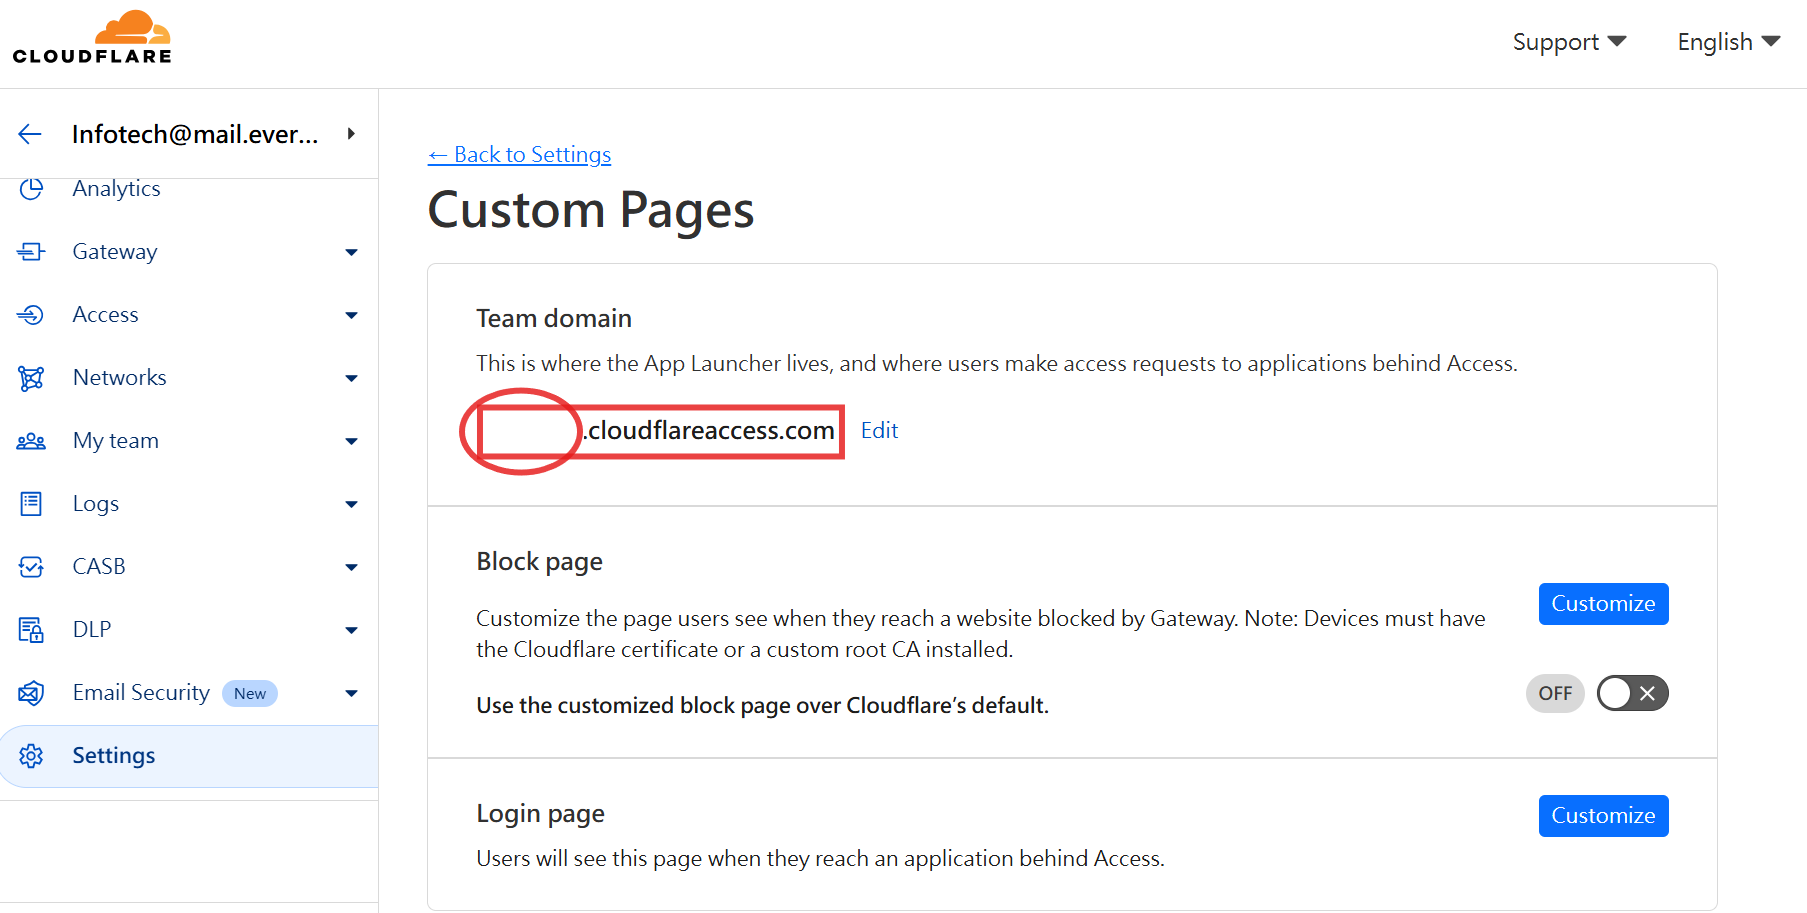
- 要先確認團隊名稱(Team domain), 可以在 Settings → Custom Pages 找到, 也就是 xxxx.cloudflareaccess.com

Windows
FAQ
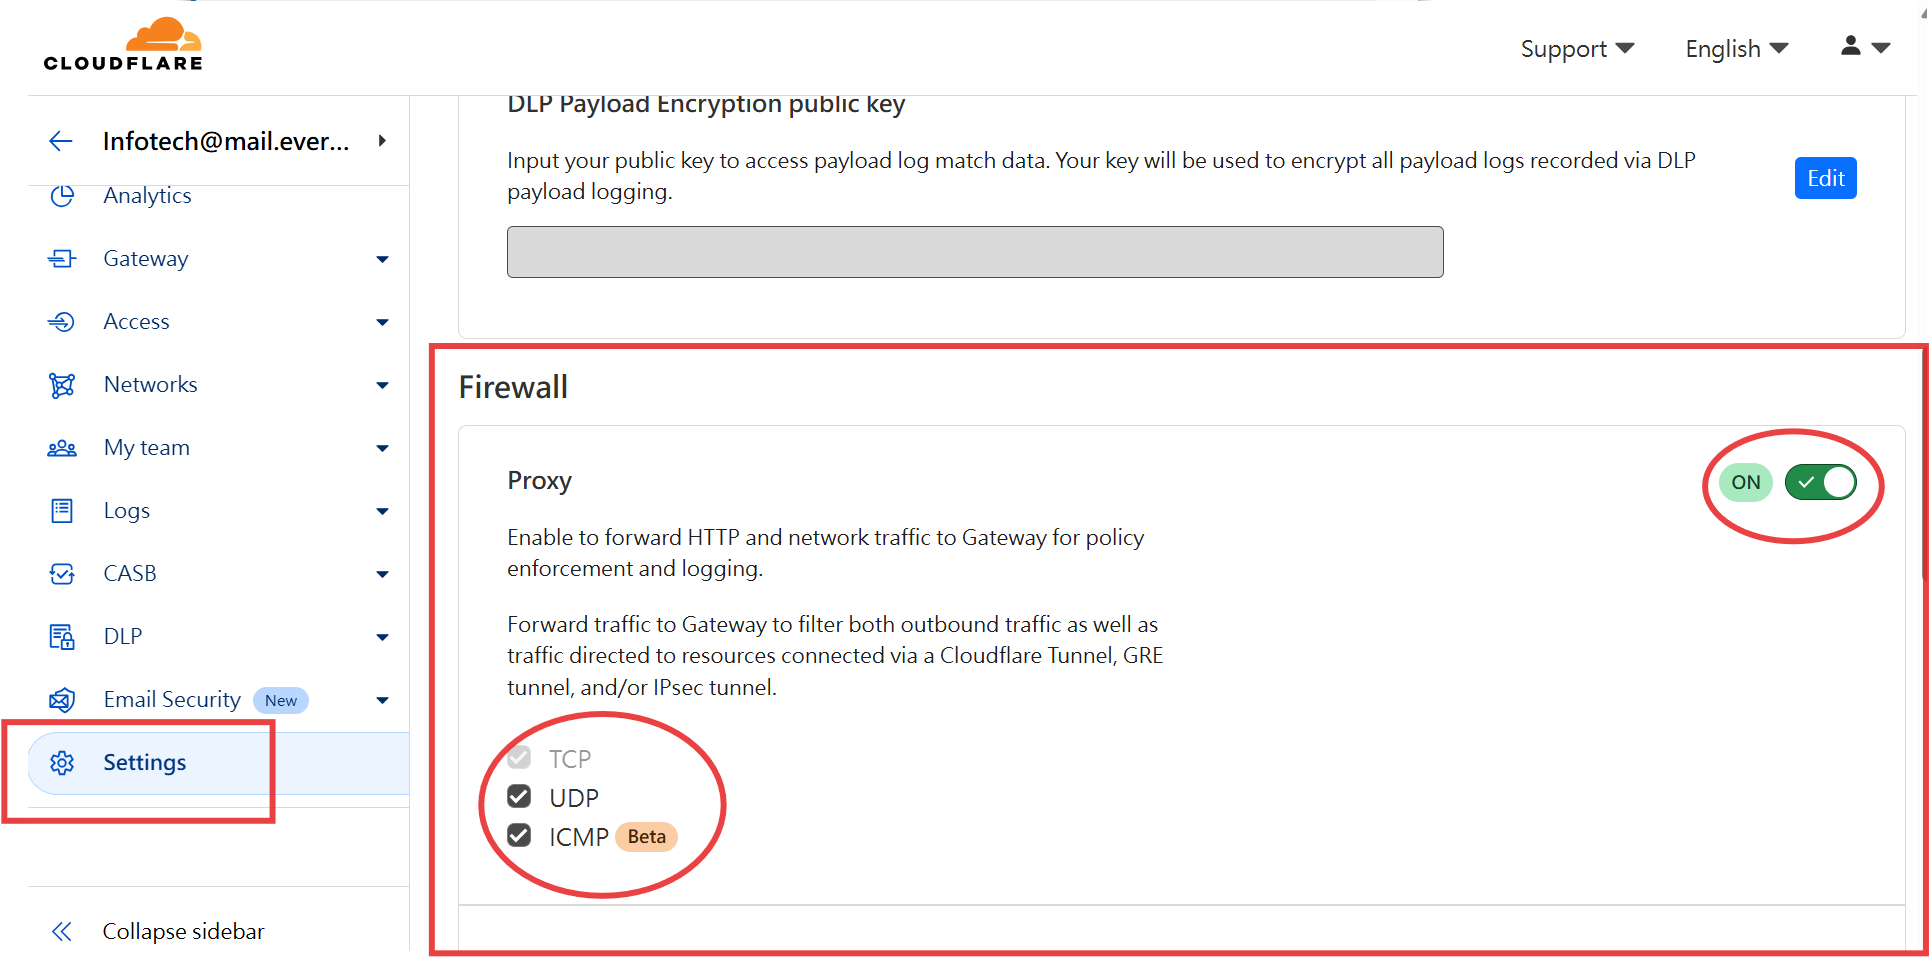
1. web 可以存取但 ping 無回應
- Settings → Network → Firewall → Proxy 啟用並勾選 UDP/ICMP

2. 如何增加 Google 認證
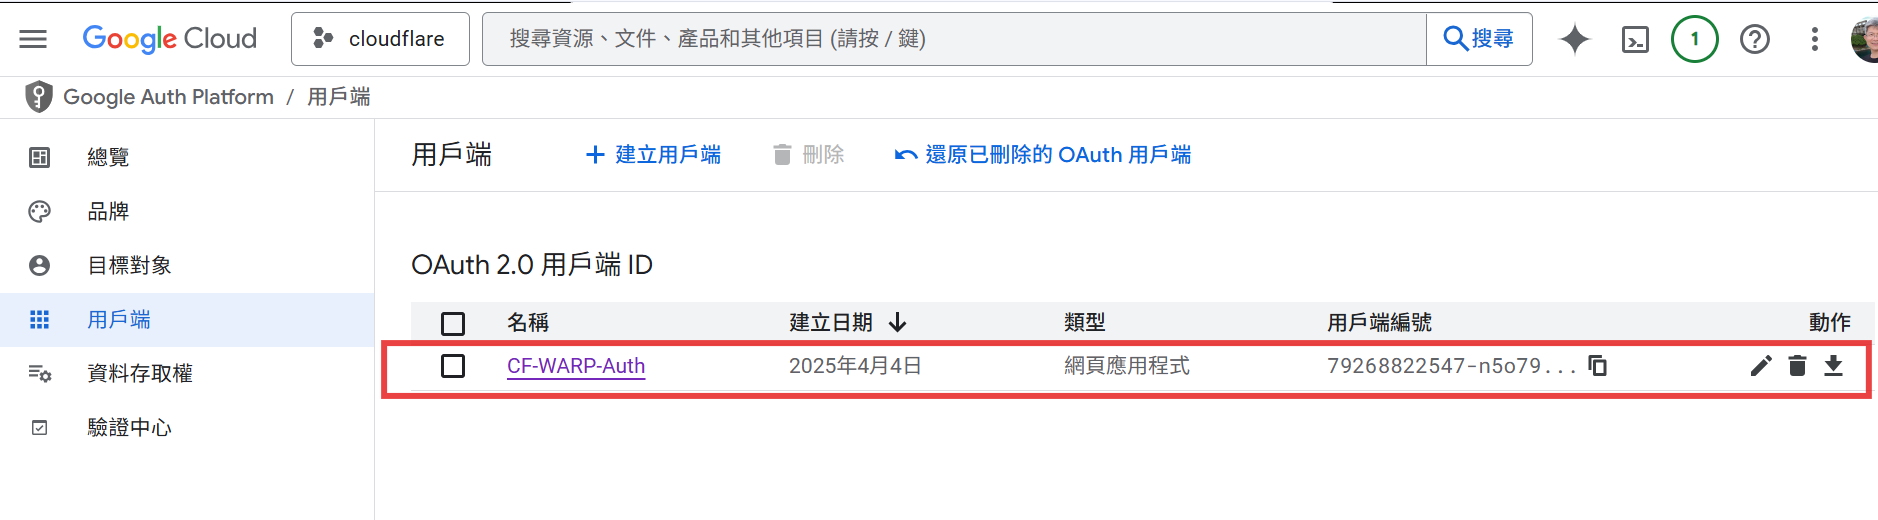
- 先到 https://console.cloud.google.com/ 新增專案 Exp. cloudflare
- API與服務 → oAuth 同意畫面 → 用戶端 → 建立用戶端
- 應用程式類型 → 網頁應用程式
- 名稱 → Exp. CF-WARP-Auth
- 確認 Cloudflare Zero Trust 的 Team Domain Exp. xxxxx
- 已授權的 JavaScript 來源 → 新增 URI → Exp. https://xxxxx.cloudflareaccess.com
- 已授權的重新導向 URI → 新增 URI → Exp. https://xxxxx.cloudflareaccess.com/cdn-cgi/access/callback
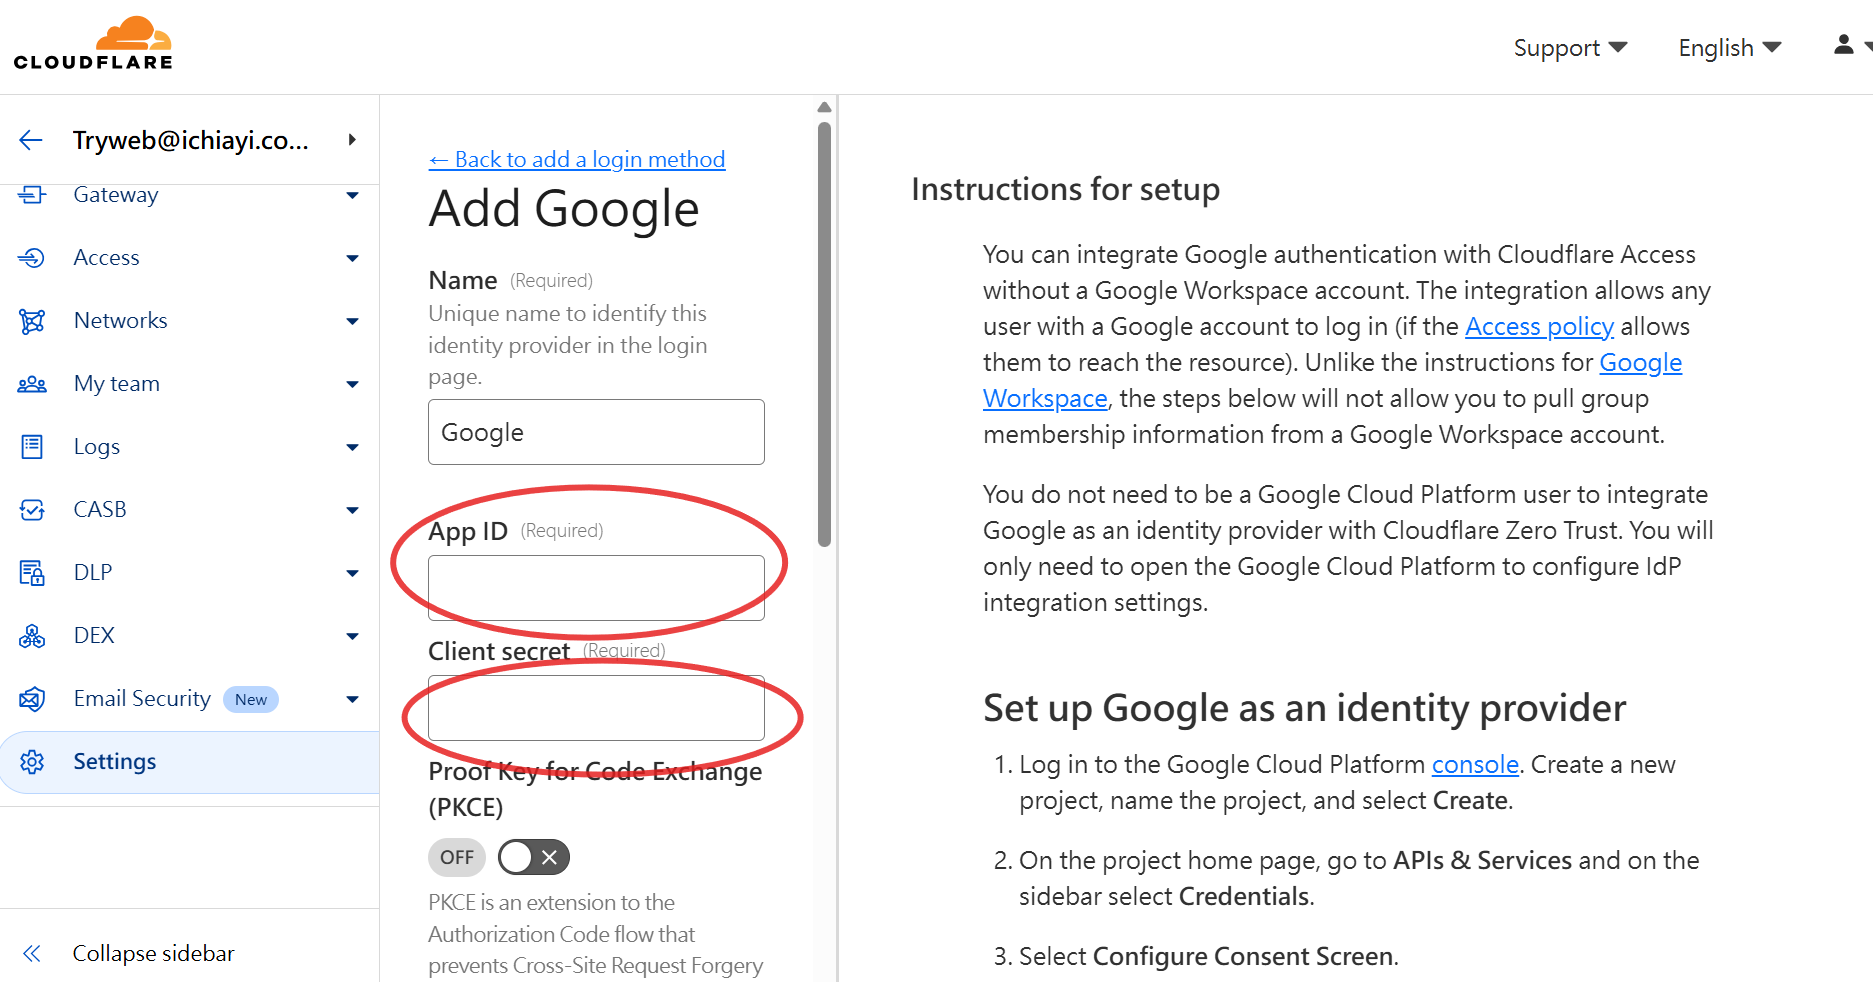
- 建立後, 複製 Client ID 與 Client secret
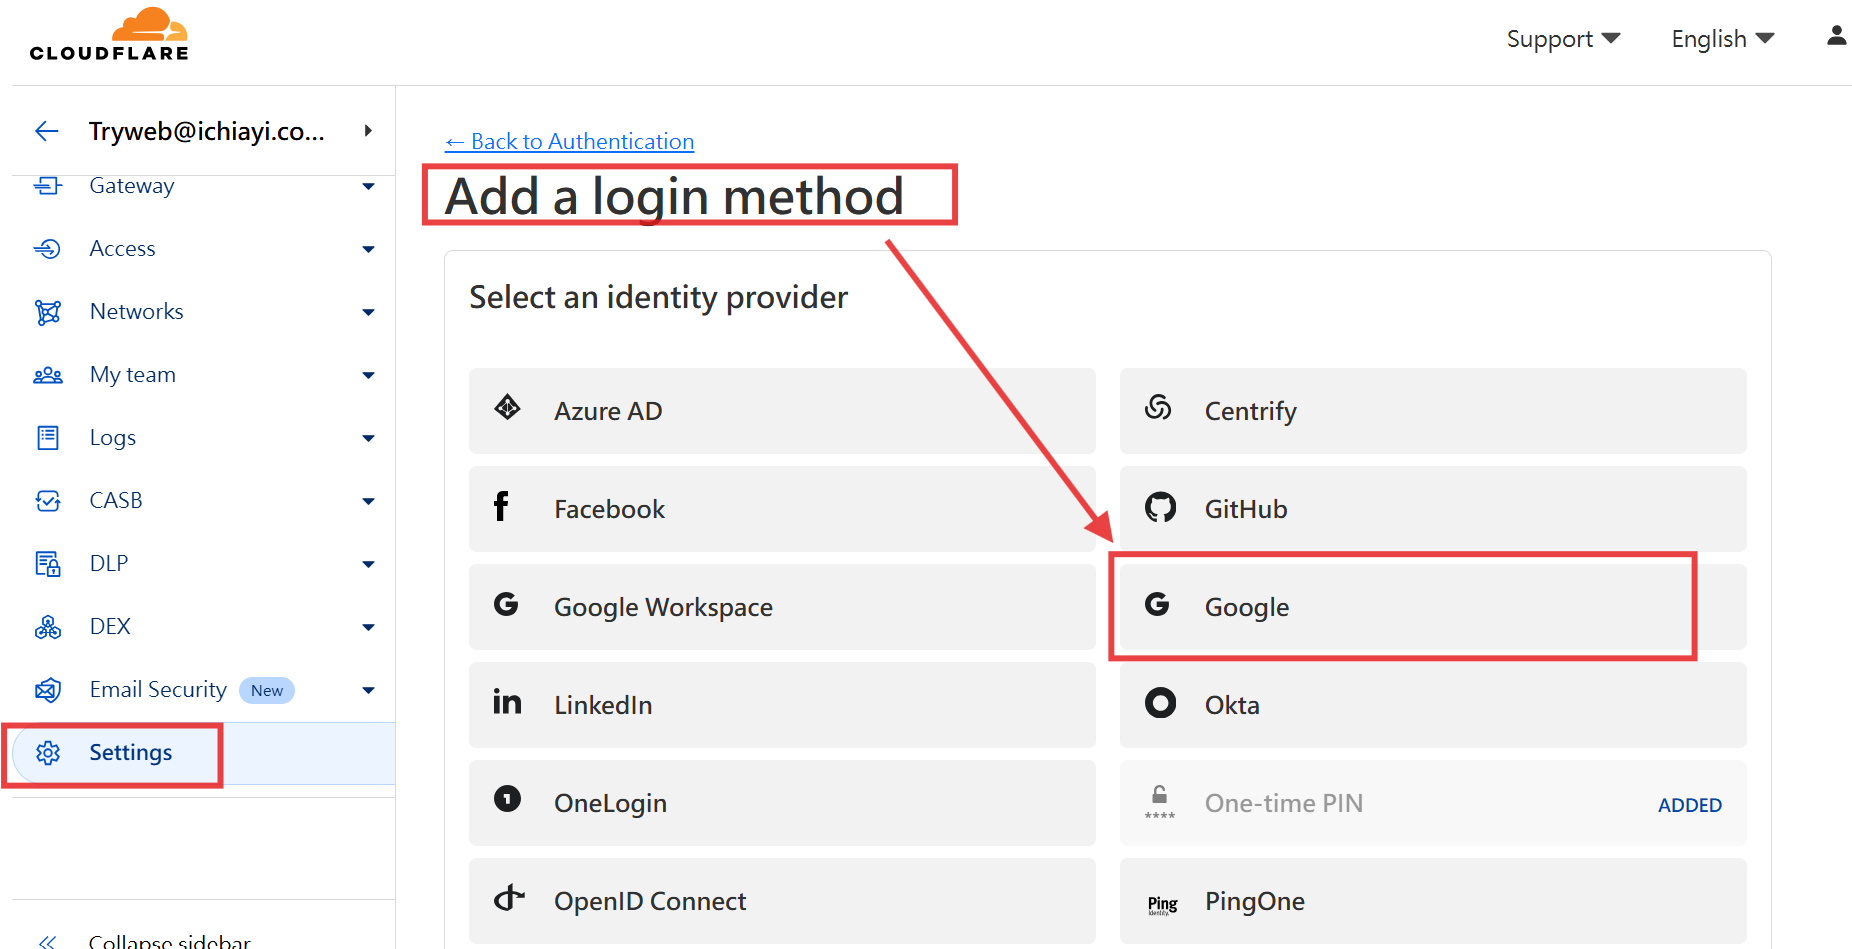
- 回到 https://one.dash.cloudflare.com/ 增加 Google Login 模式
- Settings → Authentication → Login methods → Add new → Google
- 在 App ID 填上剛剛複製的 Client ID, 在 Client secret 填上剛剛複製的 Client secret
- 修改 Access → Rule groups 設定需要 Google 認證的項目, 在 Rules 加上 Require → Selector : Login Methods , Value : Google
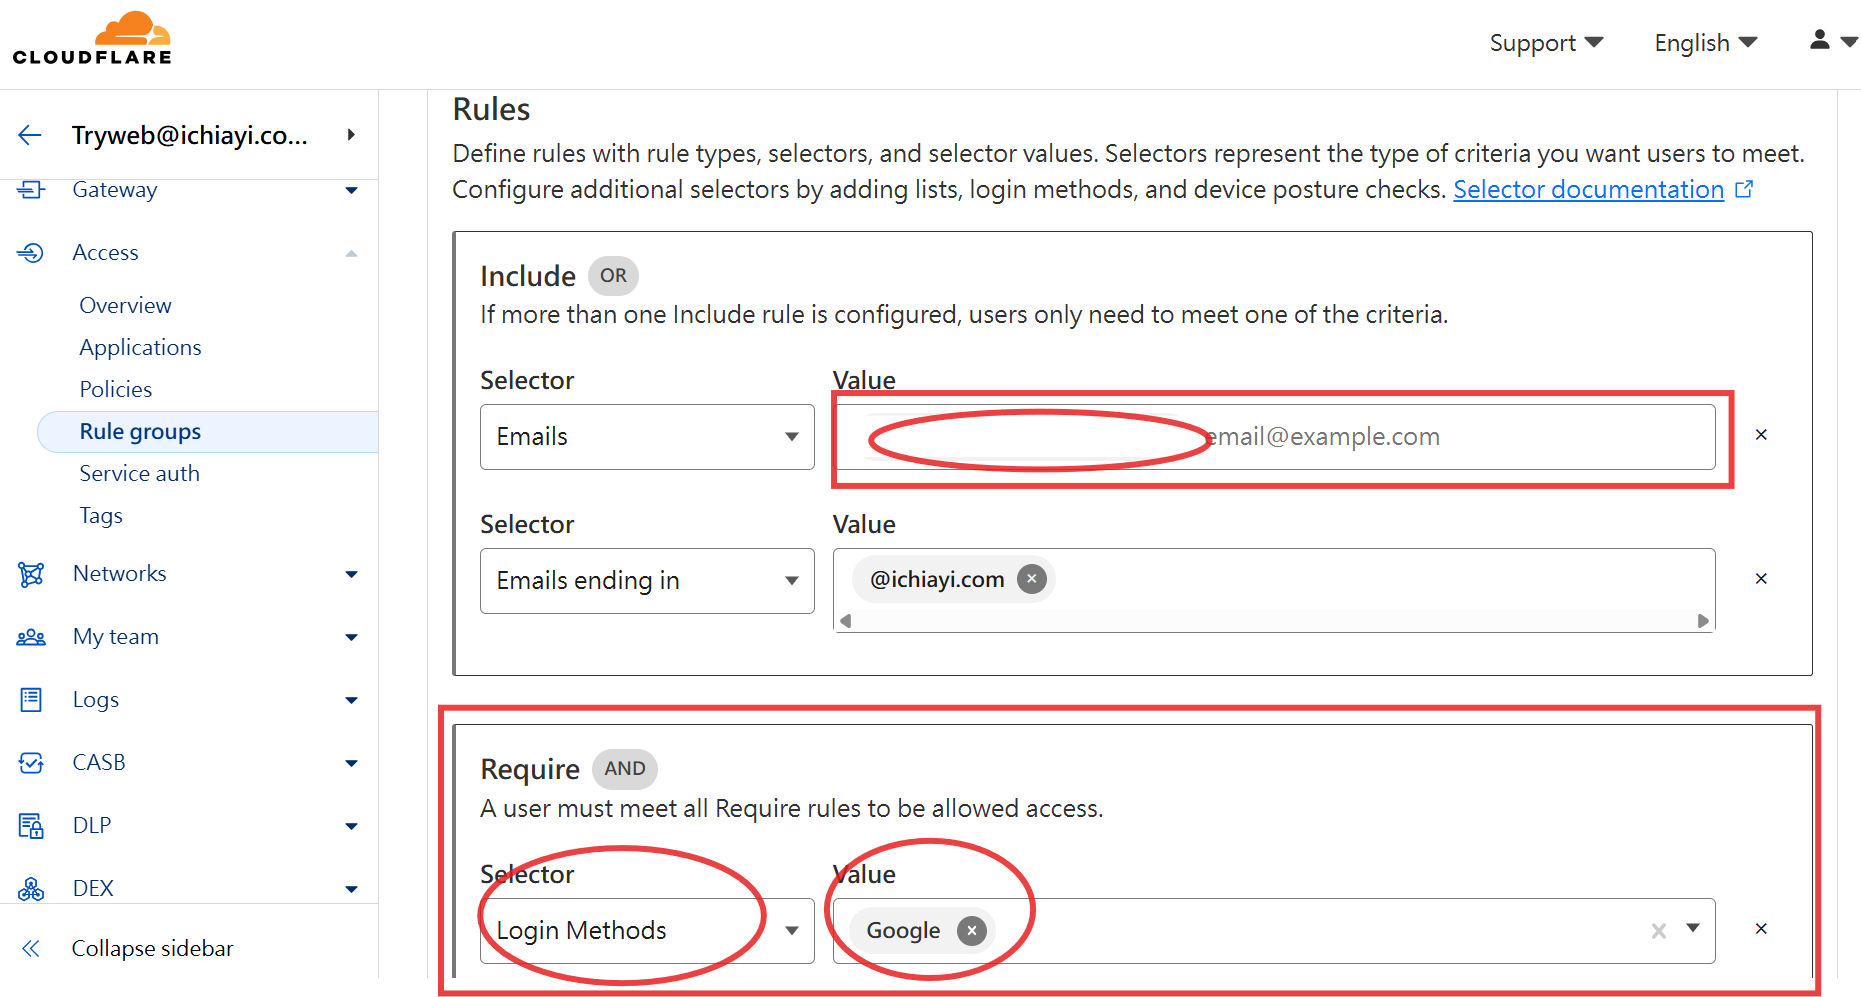
- 將透過 Google 認證的授權帳號 EMail 一一輸入 Include → Selector : Emails 的 Value 內 Exp. [email protected]
- 以上的範例還包含所有 @ichiayi.com 所有在 Google 認證的帳號都可以通過


